Batch Crop Digital Photos and Images
How can I batch crop my digital photos without buying Photoshop? Photoshop Elements only lets me crop one photo at a time. I want something that lets me keep the same aspect ratio as the original and crop out everything I don't want in the photo.
JPEGCrops remains my favorite solution for batch cropping digital images, because it provides the flexibility to either apply the same crop settings to a large block of photos in a batch, or I can quickly go through a batch of photos and customize the crop for each image before applying all the changes. The software has a ton of preset crop sizes for both European and U.S. print sizes, with additional support for defining custom crop sizes.
Be sure to download JPEGCrops before you start.
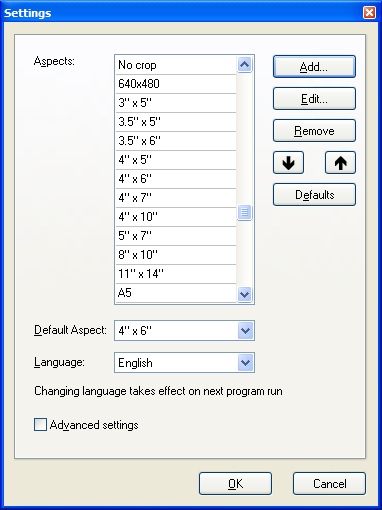
The first time you use JPEGCrops it's a good idea to configure the preferences, which are avaialble from File > Preferences (Ctrl+P). I personally never print photos at anything other than 4x6, so that's my default. In the basic mode, JPEGCrops automatically puts the cropped photo in a new folder while keeping the file name the same.
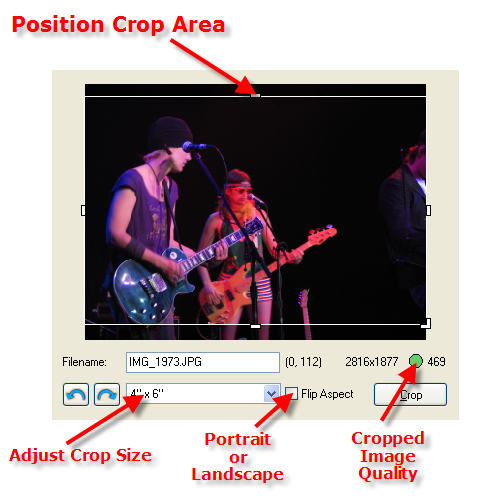
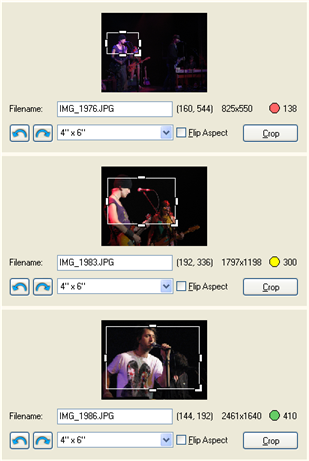 It also provides a visual indication of image quality with anything over 300 dpi being high quality, 150-299 dpi being medium quality and under 150 being low quality. This is presented both with a numeric indicator for the dpi of the cropped area as well as a visual green (high), yellow (medium) and red (low). In advanced mode, you can configure the maximum values for medium and low to define the quality threshold.
Additional advanced options let you: automatically add something to the file name (like _crop) to make it easier to distinguish between the original and the cropped file; overlay a rule of thirds grid; keep or remove the embedded thumbnail; run a script after cropping an image.
If you need a specific size (like a standard pixel width for the Web), create a custom setting using the Add new aspect feature in preferences. For instance, if you need all your images to be cropped to 320x240, you could create a custom setting like this:
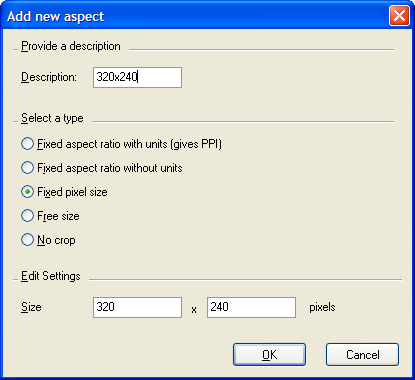
Your new option is then available as part of the Aspects list in the Settings. There are also a number of advanced configuration options if you need more control.
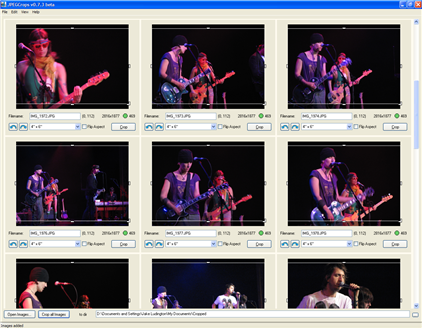
After opening the group of images you want to edit, the interface displays a thumbnail of each image. From here you can position the crop area, rotate the crop for landscape or portrait, flip the aspect ratio of the image, the crop, or both.
When all your changes are configured, use the Crop all Images to apply changes. The orginal files are left untouched, so you can always go back and re-crop the same image several different times to compare results.