Convert DVD Movies for your Sony PSP
"How can I watch my DVD movies on my Sony PSP?"
There are two ways to convert DVD Movies for your Sony PSP. The easy way to convert movies for PSP costs a few dollars, but makes it simple enough you get the money back in time saved very quickly. The hard way to convert DVDs to PSP compatible formats is free but it takes a serious amount of human intervention and time. The method you choose boils down to how much you value your time.
The easy way to convert DVDs for Sony PSP
The easiest way to accomplish the conversion is to spend a few dollars on software to do the work for you. Currently, Xilisoft DVD Ripper Ultimate is the most comprehensive solution I've found for converting DVDs for PSP playback. You can even embed subtitles in your foreign films and anime right from the Xilisoft interface. Download DVD Ripper Ultimate and get started converting now or read on for the much more complicated method.
The hard way to convert DVDs for Sony PSP
Most of the tools available for ripping DVDs contain tools that may be determined to be illegal in the United States at some point in the future because of their ability to defeat copy protection, so tread with caution in this area. The current free tools that seem to be popular for ripping DVDs both legal and otherwise are DVD Decrypter and SmartRipper. While the tools do contain features that defeat copy protection, there are also plenty of legal reasons for ripping DVDs created by you or by someone who has given you permission to use their content.
I'm making the assumption going into this that you've done your homework on getting video files off of a DVD and are now interested in being able to use those files for some other purpose. If you haven't, do a quick Google search for DVD Ripping and come back when you have the VOB files on your hard drive.
Software Required For Converting VOB to PSP:
FlasKMPEG to convert VOB files to AVI
PSP Video 9 or 3GP_Converter
In addition to having a Sony PSP, you also need a Memory Stick DUO Pro with enough space to store a feature length movie. For acceptable quality levels, you want a minimum of 256MB but ideally you want at least a 512MB Memory Stick. The 32MB Memory Stick included in the box isn't going to cut it unless you are only interested in watching 3-5 minute short films.
Since most DVD ripping tools break large DVD files into several smaller VOB chunks, I'm currently using FlasKMPEG version 0.78.39, which automatically recombines all the VOB files to form a complete movie during the VOB to AVI conversion process. The disadvantage to version 0.78.39 is it doesn't use an installer, so everything lives in the folder you unzipped it to.
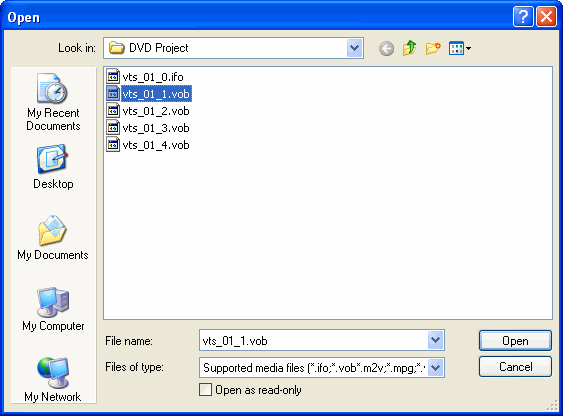
After launching FlasKMPEG by clicking on the .exe, open your video file from the File > Open menu.
At this point in the process we will output the highest quality AVI file possible and keep the video the same aspect ratio as the original.
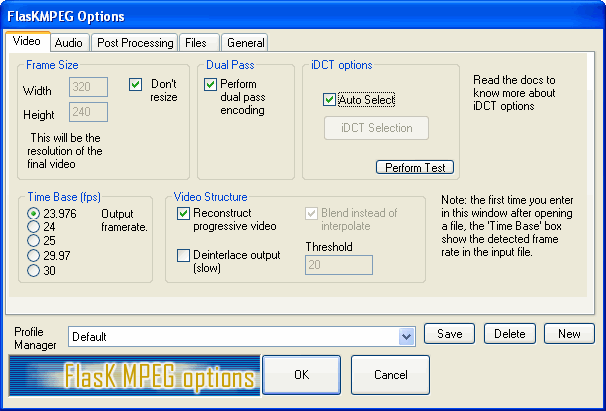
Go to Options > Advanced Options to configure settings for the AVI file.
On the video tab make sure Don't resize is checked. Check Perform dual pass encoding, which takes slightly longer but results in a better quality video file. Leave the output framerate and video structure set on the defaults.
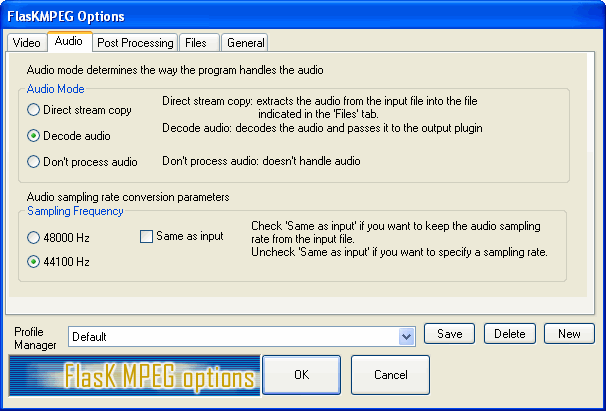
Click the Audio tab and choose Decode Audio and 44100 Hz.
Leave the default settings on the Post Processing tab.
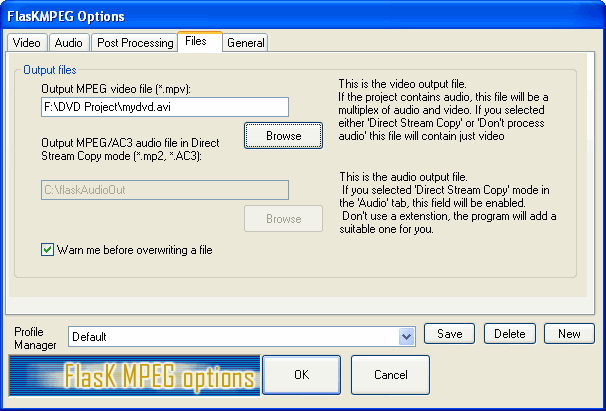
On the files tab, name the file and choose a location to save the output Click OK when you are finished.
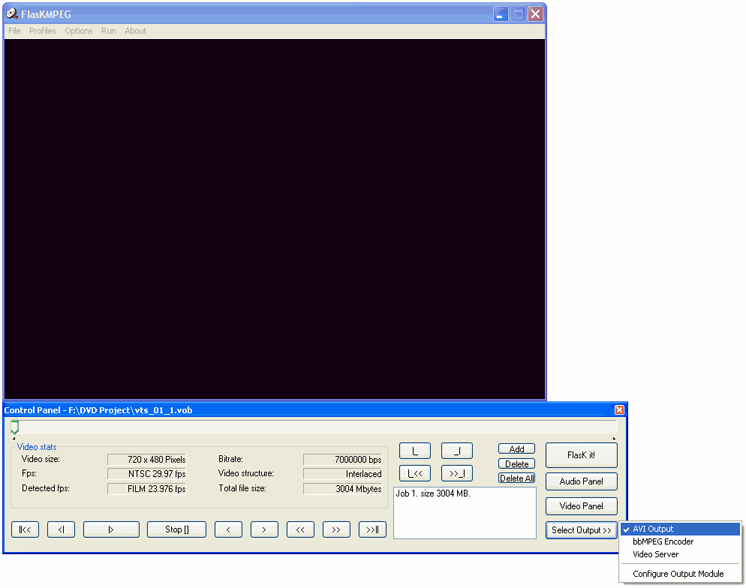
From the select output button, make sure the AVI Output option is selected. Click Configure Output Module to choose the audio and video codecs used to process the AVI output.
My best success is using the Microsoft MPEG-4 Video Codec V1 for video and << Uncompressed PCM Audio >> for the audio codec. Accepting the defaults seems to produce great video for me. At this point, FlasKMPEG will process the VOB files and output an AVI file. Plan on processing time to be approximately as long as the playtime of video file you are converting.
Click Save and Close when you are finished with the conversion.
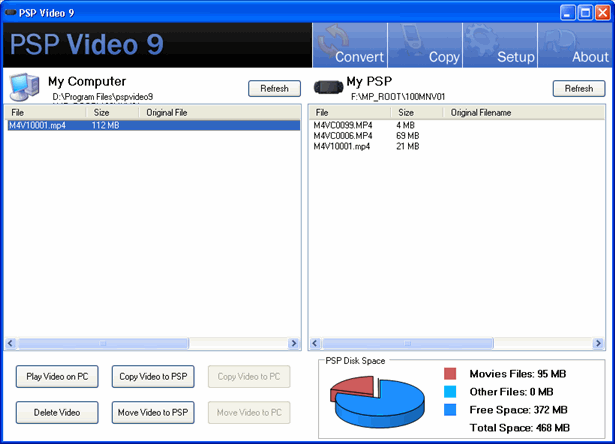
To transfer movies from your PC to the Memory Stick, you either need to connect the Memory Stick via a card reader or you need to connect the PSP in USB mode. The rest of this tutorial covers using PSP Video 9 to do the file transfer because it offers a reasonably simple user experience.
In order for the PSP to find videos on your Memory Stick, the files must be stored in a specific location. Each card must have a directory in the root folder called MP_Root with a subdirectory 100MNV01. When you browse the Memory Stick from Windows Explorer it might look something like: E:\MP_Root\100MNV01. By connecting the Memory Stick (or PSP with Memory Stick inserted) to your PC and running PSP Video 9, this directory is automatically created on the Memory Stick.
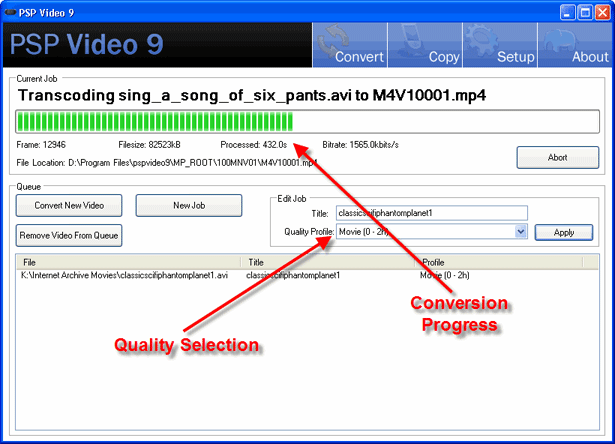
PSP Video 9 offers some convenient profiles that let you select conversion settings based on movie length. You may need to try different settings in order to find one that leaves you with enough space on the Memory Stick without having really poor video quality. For feature length movies, start with the setting for Movies 0-2 hours and experiment with other settings to figure out what works.
With the videos converted, switch to the Copy tab to transfer files directly to the card, delete videos from the card or transfer video from the PSP to your PC.