Creating Video Titles From Still Images
When you want your entire video project to stand out, a first impression goes a long way. The first images displayed in most movies are the opening credits, which are often an afterthought at the end of a long video project. Keeping them plain is one way to leave no impression, saving the bigger bang for the actual movie footage. Another option is to create something simple that captures the essence of your movie without going over the top. Something unique to the event on video goes a long way toward setting up the movie and leaving a lasting impression about the whole package. When I shot a video of Steven Page performing at a live in store in Seattle's Easy Street Records, I used the store marquee as the backdrop for my title screens. This tutorial shows you how to take any outdoor sign and fit it into the context of your video project.
For this tutorial, I'm using Adobe Photoshop Elements and Adobe Premiere Elements. You could also use something as basic as Microsoft Paint for the photo editing, although it might take longer and paint doesn't support creating multiple layers. Any video editing application can handle the JPG photos we're creating here.
The first stage is to get a high resolution photograph of the sign you want to use. This can be done either before, during or after the actual event you are covering, just make sure the shot looks good. Bring the photo into your favorite photo editing application to convert it from a still photo into the backdrop for your opening credits.
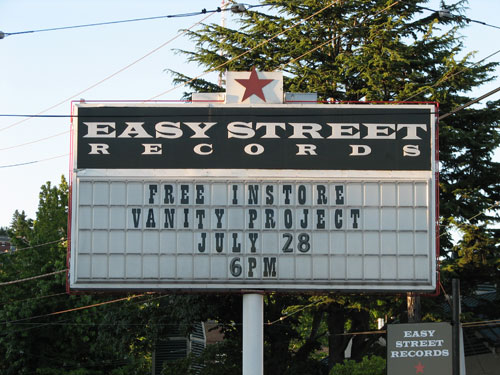
The marquee sign has a bunch of text on it related to the event. I'm going to erase the original text and replace it with my own text.
Erasing Text with Photoshop Elements
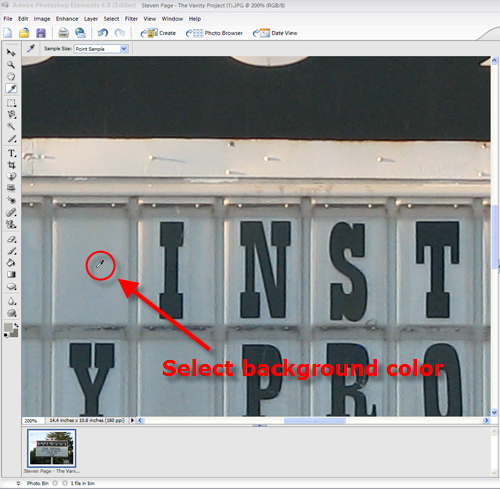
Open the photo in your photo editing app and save a copy with a new name. Zoom in to at least 200% of the original size (Photoshop uses the shortcut Ctrl+'=' to zoom)
Use the eyedropper tool to select an area in a section of the sign with a color closely matching the background where letters currently appear.
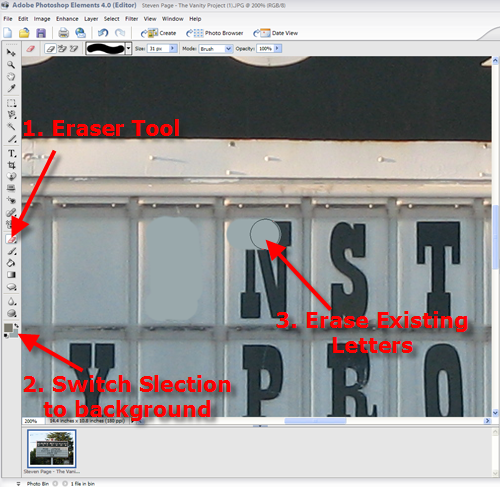
Select the Eraser tool and switch the selected color to the background using the Foreground / Background color swapping tool. Use the Eraser tool to eliminate all the letters currently on the sign, being careful to keep the individual sign spaces intact.
Once you erase all the letters resize the image to 720x480 (cropping as necessary) which is the default size for video recorded using a DV camcorder. Save the file to use this image as the template for your titles.
Adding Title Text Using Layers
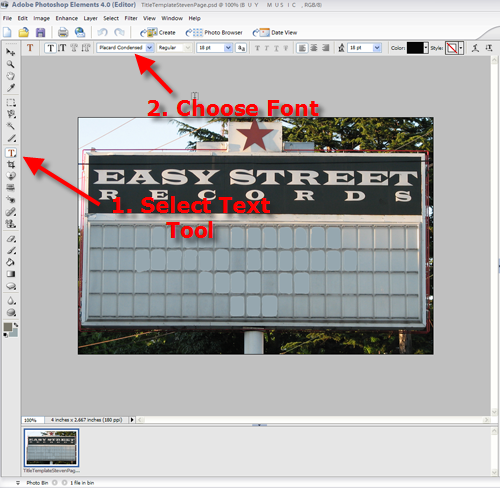
Choose a font and size that fits your sign. For my sign I went with Placard Condensed both because it was easy to read on screen and because it fit reasonably well in the marquee sign. In lining up the font with the boxes, I was generally able to simply add a single space between each letter to fit text in the boxes. Not perfect, but close.
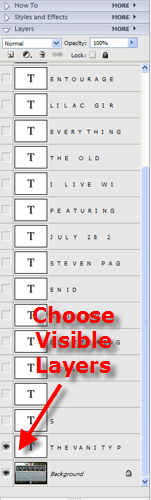
The trick here is to use the layer capability of your photo editor to save time in creating titles. I use the same base template image and reveal layers as needed in creating new title slides.
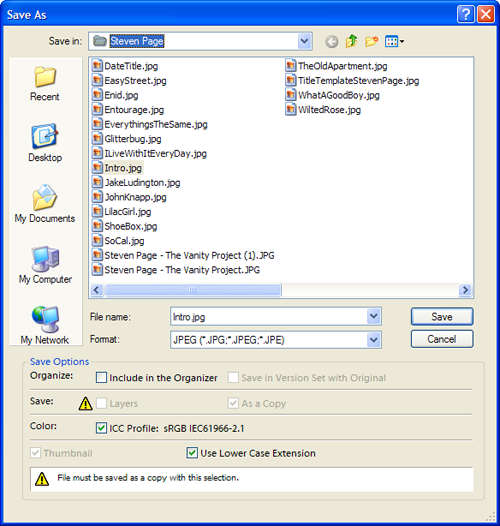
When I have the text I need for a title, I simply do a save as and create a JPG image which only shows the currently visible layers.
After saving hide the current layer and add new text in it's place.
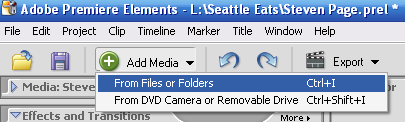
After all the title slides are created, import them into your video editing application to assemble the titles ahead of your movie.
Insert your title slides in order on the video timeline.
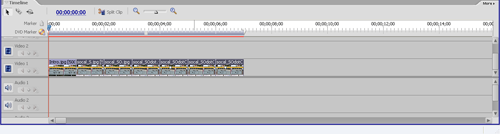
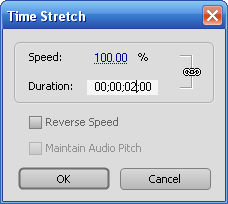
Adjust the display duration on each file until you get the timing right for your titles. Photoshop Elements should let you set a default based on frames, but I'm getting a glitch where it won't recognize a minimum smaller than 150 frames for the global value (5 minutes). Right-clicking the image in the timeline and choosing Time Stretch lets you set a different value for duration. For my titles 2 seconds is almost too long.
Save out the finished movie project. You can see an example of the titles demoed here in action below:
You can take the concept of using individual layers in Photoshop Elements a step further to build out titles that appear to write text on the screen as well. Start with the same basic image and gradually add a series of letters to spell out what you want giving you an effect like what's demonstrated in this video: