Windows Movie Maker Custom Export Formats
To create your own Windows Movie Maker custom export profile, you need the free Windows Media Profile Editor, which is installed as part of the Windows Media Encoder download. Despite Windows Media Player being at version 10, the latest version of the encoder is still associated with the Windows Media 9 Series codecs. You can download the encoder from Microsoft.
Once you install Windows Media Encoder, open Profile Editor from Start > All Programs > Windows Media > Utilities > Windows Media Profile Editor. You can create an export profile from scratch by manually configuring each setting
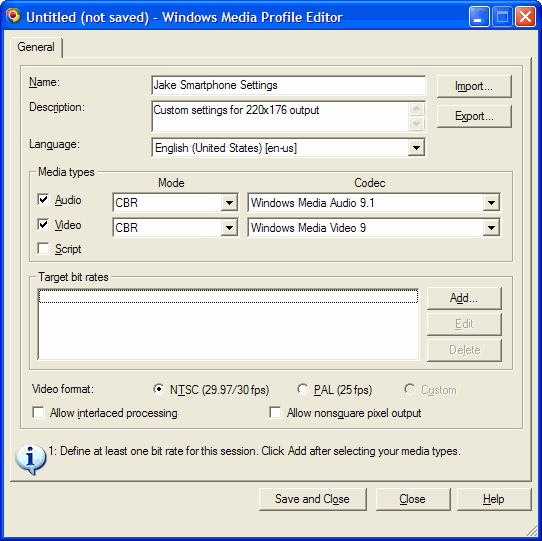
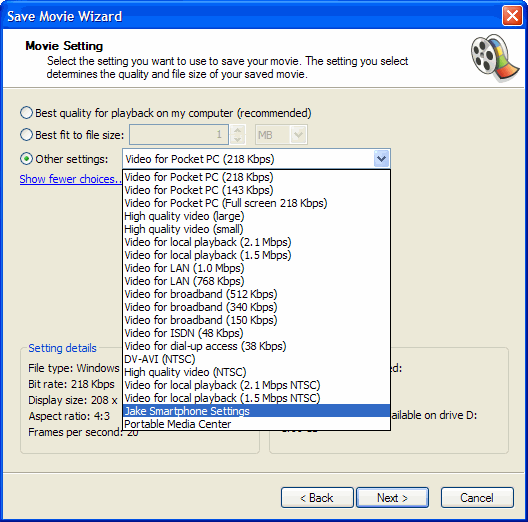
The first part of this process is naming your profile and providing a description. This makes it easy to identify in the Windows Movie Maker Save Movie wizard. Check the boxes next to Audio and Video, accepting the default Windows Media Audio 9.1 and Windows Media Video 9 for the codecs.
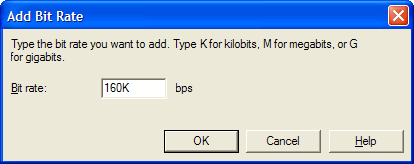
With the basic configuration out of the way, define the parameters for your video output by adding a target bit rate. Click the Add button to get started. Select a target bit rate type of either K (kilobits), M (megabits) or G (gigabits). Assuming your movie will be viewed on either a portable device or by people downloading it from the Web, K will suffice. The actual target bit rate will vary depending on your project, in my Smartphone example, I'm using 160Kbps while something like the Portable Media Center has a maximum bit rate of 800Kbps.
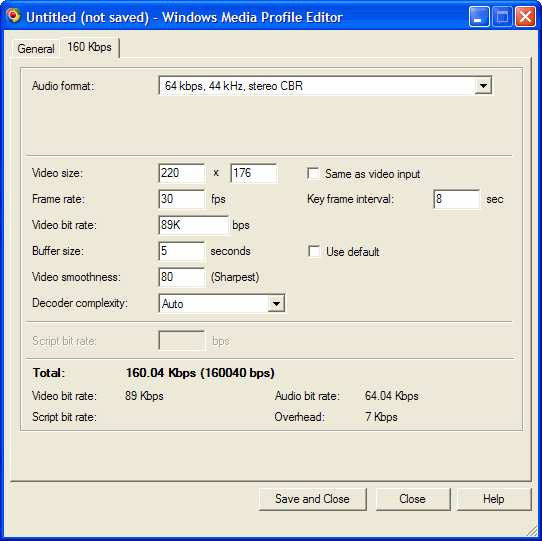
The target bit rate is a combination of audio and video settings. My ears perceive a noticeable audio quality difference for most audio below 64kbps, so that's my audio minimum. You may have different preferences. If I set a hard limit on 160Kbps, my maximum video bit rate is 88Kbps, because the combined 64.04kbps for audio and 88Kbps rounds to 160Kbps (in the example I rounded up to 89Kbps video rate). I prefer full motion video at 30fps. If you switch to 30fps from the 15fps default, it's a good idea to change the keyframe interval to 3-4 seconds from the default of 8 because the number of frames between keyframes is doubled when moving from 15 to 30fps.
With all your settings configured, click the Save and Close. Name your profile and save it in the
Another option is to base your profile on one of the settings already included in Windows Media Encoder. To use one of the encoder profiles as a guide, click the Import button and browse through the list of options included in: