Automatically Scan Documents to Evernote
One of the key things helping me achieve my goal of eliminating paper from my life is scanning documents and storing them in my Evernote account. I'm keeping a backup copy of the digital files too, just in case. I use Evernote for so many things it just makes sense to store things like receipts and papers I may or may not ever refer to again in there too. I had been scanning documents to a folder and then adding them to my Evernote account after scanning, but automating the process makes more sense. The one additional requirement here is a Fujitsu ScanSnap scanner, which is by far the best scanner I've ever used. ScanSnap hardware isn't cheap, but it scans both sides, dumps blank pages, automatically rotates your document, and will perform OCR if you want it to. In other words, the additional expense quickly pays for itself in time saved. Assuming you've got a ScanSnap, here are the steps to follow to automatically store your scanned paper in Evernote.
Configuring the ScanSnap software to automatically import your documents to Evernote requires a few simple configuration changes to the ScanSnap Manager software. To get started right-click the ScanSnap Manager icon in your taskbar and click on Scan Button Settings.
Uncheck the box next to Use Quick Menu and click the Details button to reveal the Application button. Click the Add or Remove button and browse to the Evernote.exe application file, which will probably be located in either of the following locations:
C:\Program Files (x86)\Evernote\Evernote\Evernote.exe
C:\Program Files\Evernote\Evernote\Evernote.exe
Change the name from New Application to Evernote and click OK. Now you need to choose Evernote from the dropdown menu.
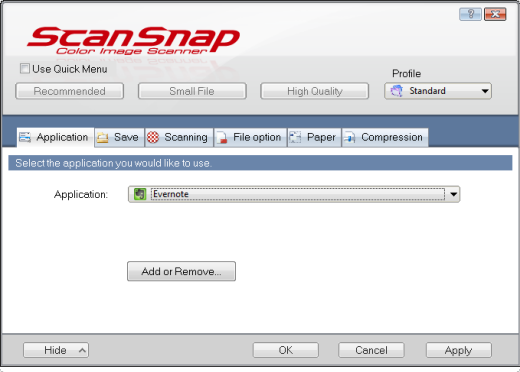
At this point ScanSnap is ready to upload your documents to Evernote automatically. You may want to take another step and check the File option tab to set your PDF preferences.