How to Upload to a Public iDisk from Windows (or Mac)
"How does a Windows user upload to my public directory on iDisk?"
While Windows users can have a MobileMe account with an iDisk, most of them don't, but that doesn't mean they can't use your public directory if you give them permission. Uploading to an iDisk public directory is basically the same for both Windows and Mac users. For a Windows user to be able to successfully upload to your iDisk, you need to have the correct permissions set in your MobileMe account. There may be a password required from the iDisk account holder. Here's how to upload from Windows or Mac to a public directory on iDisk:
The first thing you need to do is make sure you have the proper permissions set in your MobileMe account. For public uploading to be enabled, you need to select Allow others to: Read and Write. This is the setting that allows someone other than you to both see files stored in your iDisk as well as post additional files to your iDisk. Password protecting your public folder is optional, but if you are going to allow uploading to your iDisk, I strongly recommend using a password. You don't want someone to end up posting something nasty to your MobileMe iDisk. Make sure this password is not the same password you use for your MobileMe account so that you don't risk allowing someone to take control of your account.
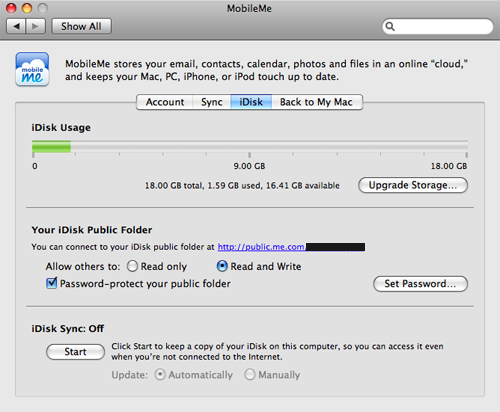
When you tell people where your iDisk is, send them the link to:
http://public.me.com/username (replacing username with your MobileMe username)
When someone arrives at this iDisk page, they will be prompted for a username and password. The username will be the word public. The password is the one you created when you clicked the Set Password button.
When connecting from Windows, Mapping a network drive is also an option. To map a network drive to iDisk, open Start > Computer and click on the link to Map Network Drive using the same URL and username and password.