Add Windows Media to iTunes
Vicki writes, I just got an iPod for Christmas. I have been downloading songs (from my CDs here at home) onto Windows Media Player. I was able (but I have no idea how) to get those all to transfer to iTunes. But now, I have since added more songs to Windows Media Player and they are not automatically transferring over to iTunes (so that I can transfer them to the new iPod). How did I do this the first time? How can I do it again?
It's been awhile since I installed iTunes on a totally clean system, but if I remember correctly, the first time you install iTunes on your system it automatically checks for music files on your hard drive. If you have WMA format files (the default for Windows Media Player), the software offers to convert WMA files the first time around. Going forward, any new WMA files are ignored until you add a single file or folder to your iTunes library. Since you likely want to put any new music tracks on your iPod going forward, there are a few ways to handle this.
To get any of the existing Windows Media files converted for iTunes, open iTunes and from the File menu either Add File to import a single file or Add Folder to import all the files from a specific folder.
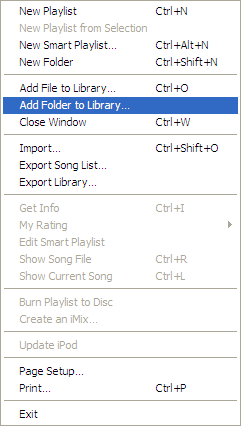
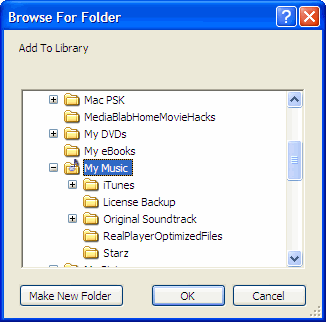
By default, Windows Media Player stores all music in the My Music folder. By choosing Add Folder and selecting My Music, iTunes should import any Windows Media files currently stored in your My Music folder.
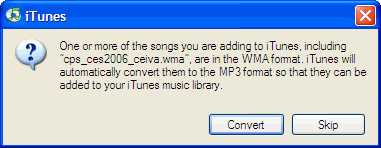
iTunes then prompts you to convert any WMA files before adding the files to your iTunes Library.
Going forward there are two ways to make this process easier. If you want to put all your songs on your iPod, but keep them available to Windows Media Player for playback, using iTunes to rip your CDs to MP3 might be the best strategy. This automatically adds songs to your iPod based on the preferences you selected in iTunes, while keeping the files in a format compatible with Windows Media Player.
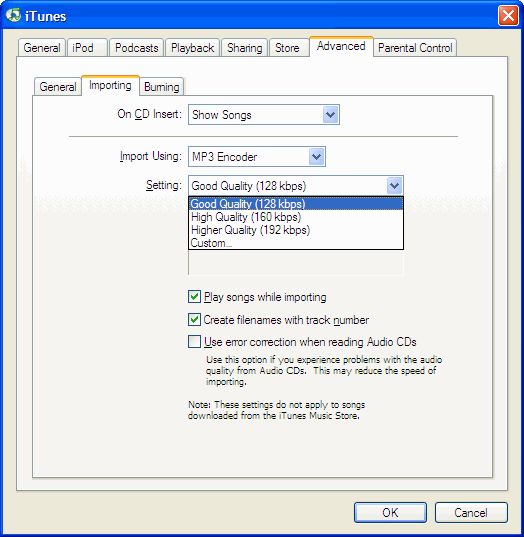
If you aren't sure which format iTunes currently sets for importing songs, open Edit > Preferences and click on the Advanced tab. From the Importing tab, verify Import Using: is set to MP3 Encoder with Setting at a minimum of Good Quality (128 kbps). Click OK when finished.
If you plan to continue ripping CDs with Windows Media Player, you can save some time by changing the Rip Music preferences. From the Windows Media Player menu, choose Tools > Options. Click on the Rip Music tab. From the format menu, choose mp3. Adjust the quality slider somewhere between the smallest file size (128 kbps) and Best Quality (320 kbps) before clicking OK.
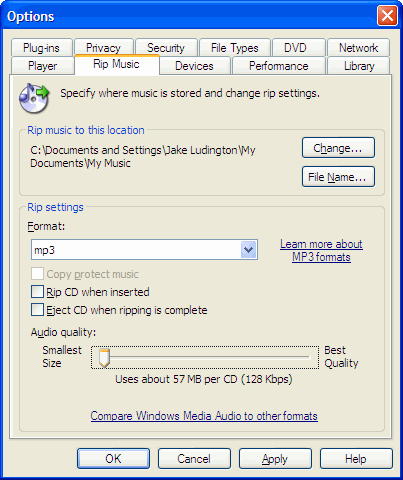
Using this approach, you still need to Add File or Add Folder to your iTunes library using the steps above when you rip music with Windows Media Player, but you save time in needing to convert files from WMA to MP3.