Save Movies to DV Tape
Monica writes, "I am a novice at video editing, and run both a Dell and a G4 Mac. I was stumped by a friend's request to edit a bit if video, and then return the edited video (it's a long story) back on to the DV mini tape in the digital camcorder. The software you are discussing in this article (Firestreamer and DV Backup)... are these appropriate for recording video back to DV mini tapes in the DV Camcorder?"
While you certainly could use Firestreamer or DV Backup, those applications are intended for archiving data files, not saving a DV movie. If you save the movie as a data file on the DV tape, your friend won't be able to play it back. This is much like the difference between burning a CD with MP3s vs. burning a CD-Audio disk for playback on your home stereo. In both cases the information is transferred, but it isn't necessarily accessible to your home stereo. Fortunately, there's a much easier way to save your movies to DV tape.
Before I show you the steps for saving the movie, keep in mind that saving the finished movie over the original footage will overwrite the original footage, rendering it lost forever. For the price of a $4.00 video tape, keep the original footage and save the edited version to a second tape. If you want to do a re-edit a year from now, the footage will still be available for source.
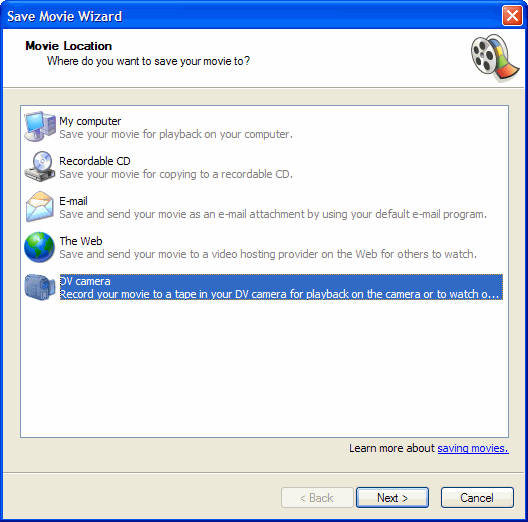
If you use Windows Movie Maker to do the video editing, you're a wizard interface away from saving the movie to a DV tape. Make sure the DV camera is connected to your PC and turned on in playback mode (VTR or VCR). From the File Menu, choose Save Movie File and select DV Camera as the location. Make sure the new tape is in the DV camera and save the file to tape. Keep in mind this process will take the full run time of your movie because it is transferring from your hard drive to tape in real time.
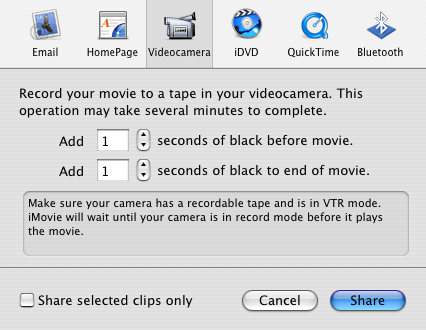
iMovie uses a similar process for transferring video from your Mac to DV tape. With the DV camera connected to your Mac and in playback mode, select Share from the File menu. Choose the DV cam icon. Select the number of seconds of black screen you want to place before and after the movie (default for each is 1 second). After adjusting settings, click the share button to export to DV tape.